Log inRegister
Web Client - Search for Patrons
03 Oct 2019 - 11:20
|
Version 13
|
lstratton
v.3
Search Form
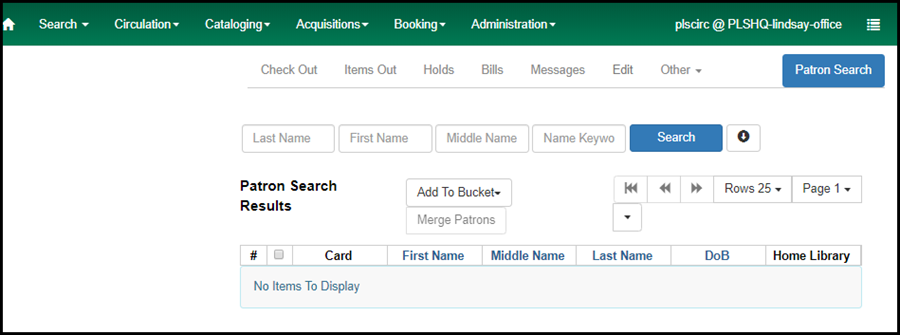
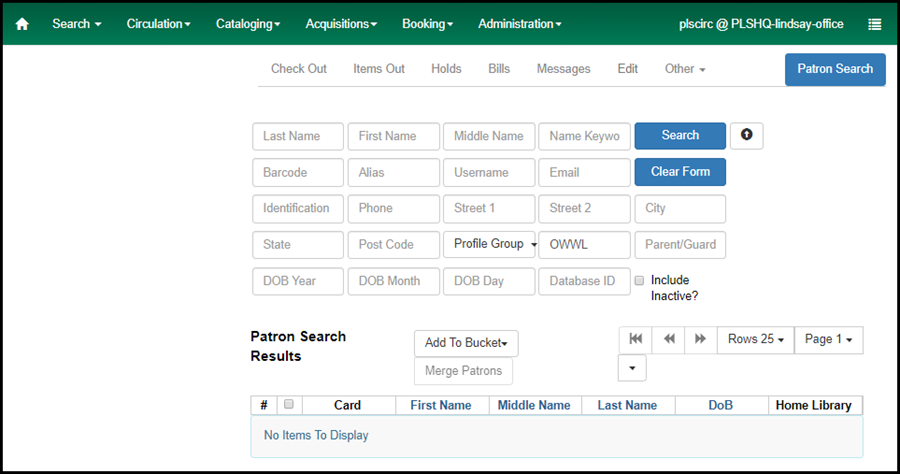
The Patron Search form can be displayed in a minimized or expanded version. This is changed by clicking the arrow next to the Search button; once changed, the display will stay expanded/collapsed for the next search.- Basic search - Show More Fields

- Expanded search - Show Fewer Fields

Basic search options
Expanded Search Options
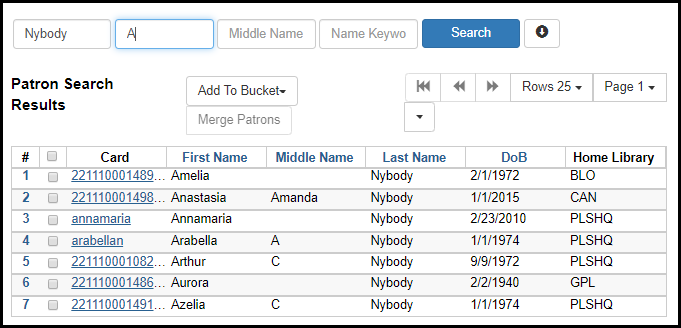
Basic search by name
- From the Home Screen or using the Search menu, click Search for Patron by Name
- In the search form, in the appropriate boxes enter full names or use the first few characters
- The search matches characters in the specific field, from left to right
- The Name Keyword option can be used to search a name, or part of a name, across all name fields and will match the string in any part of the name. This is helpful when searching for patrons with hyphenated names.
- Click Search
- All matching records will populate the list
- NOTE: it is recommended that you change the list columns so that the data displayed in relevant and useful
Preview patron information
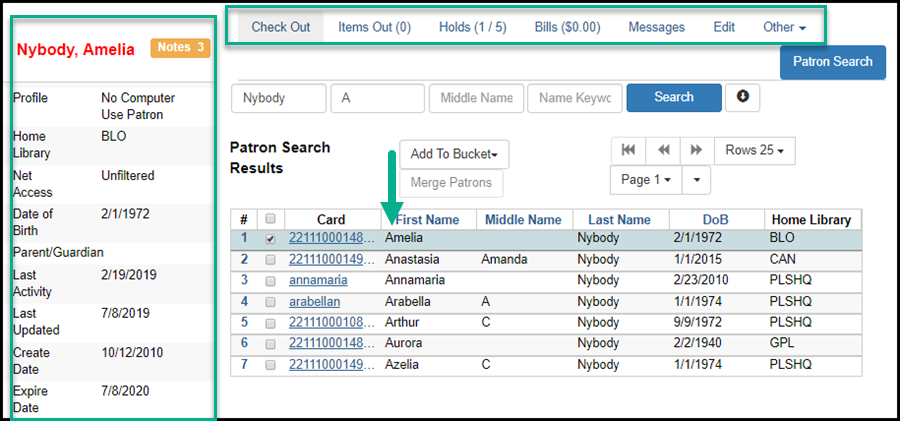
- Clicking anywhere in a patron row will both highlight (the row turns blue) and select (the row is checked) the record
- Patron information summary details will display to the left
- Patron circ summary details will display in the circ function tabs at the top
Enter the patron record
- Double click the patron record row, or
- Click the Card link to go to Checkout, or
- Click any of the function links: Check Out, Items Out, Holds, Bills, Edit to access those screens
- The function tab will highlight dark blue, indicating the active screen
- If there is an alert on the account it will display before the selected function
- If the patron has bills, the Bills screen will open before the selected function
- Within the function screens, the Patron Search button remains available
- Depending on the action taken on the patron record, clicking Patron Search will open either a blank patron search form or the previous search result list
Search list options
Add to [patron] bucket
Patron buckets allow staff to make batch actions on multipl, selected patron records. Records can be selected from a series of searches, saved to a bucket, and batch edited at a later date.- Perform a patron search to retrieve records
- Click in the selection box of the records
- NOTE: while clicking anywhere in the record row will highlight and select that record, you must click in the selection box to select multiple records from a single list
- Once records have been selected, click Add to Bucket
- If this is your first bucket, or you are working on a new project, click New Bucket
- In the Create Bucket form add a Name
- An optional Description
- If other staff at your library will also need to access the bucket, select Staff Sharable?
- Click Create Bucket
- A note will pop up confirming the addition of the records to the bucket
- Continue to search for records and add to the saved bucket
Merge Patrons
If a patron has multiple records, they can be merged into one record. All activity, bills, holds, etc. will be condensed into the single record.- Select the duplicate records in the Search Results list and click Merge Patrons
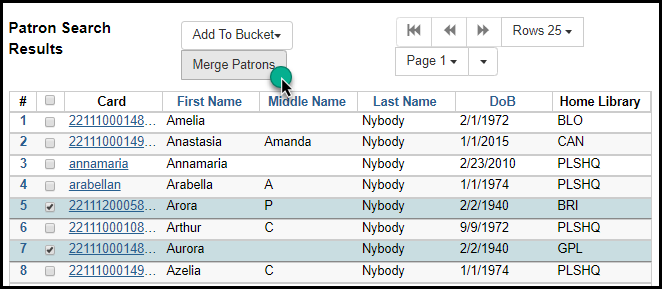
- A pop up will open displaying both records for comparison. Be VERY CAREFUL when merging records to make sure the records are actual duplicates, and not records for different people with similar information. Before merging a record, verify with the patron both sets of information.
- Select the "lead" record - this is the barcode number that will remain active, and the username and contact information that will populate the record
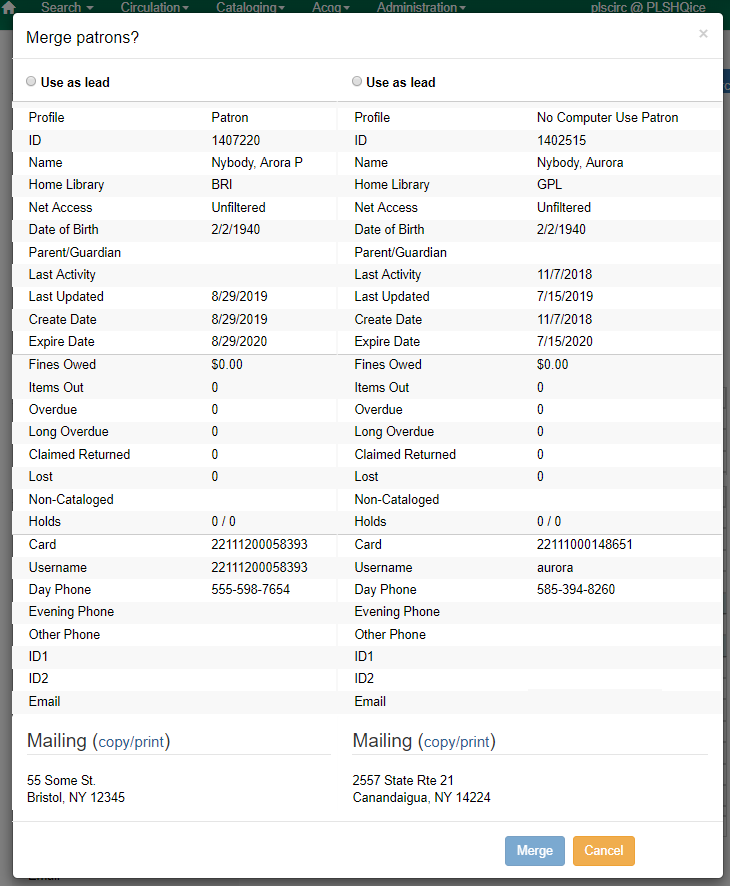
- Click Merge
- The Search results list will refresh to display the single record
- Edit the record to update any bad data
Number of rows to display per page and page navigation
There is no longer a limit to the number of patrons returned in the search results. To manage the display, you can set the number of rows to display, ranging from 5 to 100, 25 rows is the default. Whatever value is set will remain until a different value is selected. To move between pages, click the arrow buttons: start, previous page, next page, or use the drop down option to go to a specific page. Copyright © by the contributing authors. All material on this collaboration platform is the property of the contributing authors.
 Ideas, requests, problems regarding OWWL Docs? Send feedback
